
1. Template Installation
2. Logo Setup
3. Template Setting
Top Social Widget
Go to your blogger dashboard → Layout → click Edit link on Top Social widget.

Top Menu
Go to your blogger dashboard → Layout → click Edit link on Top Menu widget.

Main Menu/DropDown
Go to your blogger dashboard → Layout → click Edit link on Main Menu widget.
Normal Link : MenuItem
Sub Link: _MenuItem

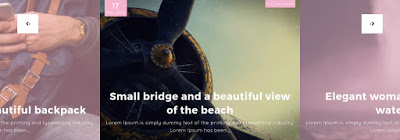
Label Based Slider Post Widgets

Access your blog Layout → click Edit link. add your desired name in the title section and desired label in the html/javascript area.
> Featured Post. (Max post - 8)
Image Example:
Instagram Widget
Access your blog Layout > click Edit link on Instagram Widget.
Paste this Below code into it.
<div id='instafeed'/>
<script type='text/javascript'>//<![CDATA[
var feed = new Instafeed({
get: 'user',
userId: 3541708255,
limit:6,
sortBy:'random',
accessToken: '3541708255.1677ed0.5e79fa74dcac4a52bea0ebba51eacb88',
template: '<li><a href="{{link}}" target="_blank"><img src="{{image}}" /><div class="insta-likes"><div style="display: table; vertical-align: middle; height: 100%; width: 100%;"><span style="display: table-cell; vertical-align: middle; height: 100%; width: 100%;">{{likes}} <i class="fa fa-heart"></i><br/>{{comments}} <i class="fa fa-comment"></i></span></div></div></a></li>',
resolution: 'standard_resolution'
});
feed.run();
//]]>
</script></div>
In above code you you will see a
accessToken: ‘3541708255.1677ed0.5e79fa74dcac4a52bea0ebba51eacb88′,
This – 3541708255.1677ed0.5e79fa74dcac4a52bea0ebba51eacb88 is a access token ID.
Now you need to create you new one and replace with this.
How to Create Instagram Access Token
1. You need access token for instagram widget to work
Go to this url-> http://instagram.pixelunion.net/
Login Via your instagram Account and Generate access token in a single click.
2. Once you get access token just replace with this access token with in a your code.
Theme Colors
Access your blog Template > click Customize.
Here is where you can change the main color of the model, using your favorite colors.
